Fawn: 2017

Pages

Thursday, December 7, 2017

How to Host a Holiday Gift Wrapping Party with Minted

This review is based strictly on my opinion.  Others may have a different opinion or experience with the product listed above.  I was provided the sample free of charge by Minted and I provided my honest opinion. No other type of compensation was received for this review. This post contains affiliate links.


I am thrilled to partner with Minted to bring you a festive holiday gift wrapping party!


Now that you've finished all your  holiday shopping, you've got a mountain of gifts that need to be wrapped. Let's tackle that job in the best way possible!  Invite your best friends over to check off one of the many things on your holiday to-do list; gift wrapping.
I am all about the presentation of a gift.  Don't you love when the recipient tells you the gift you gave is too pretty to unwrap? Yeah, me too.  With Minted's stunning and unique wrapping paper, it's easy to create a gorgeous present that will be too pretty to open!

Every gathering needs delicious treats for guests to nibble on and these gorgeous gingerbread cookies from Baby Gabey Cookies were the perfect fit. I placed them on a darling small modern cake plate and the guests adored their festive goodies!


Wrapping paper isn't only for making packages look pretty. I placed a sheet of beautiful paper on the dessert table and loved how it served as pretty place mat for the cookie plate. 


 Crank up that Christmas playlist and let's get this party started! May I suggest the perfect song to get the ball rollin'? 
"Christmas Wrapping" by the Waitresses.
 Such a classic!

For our gift wrapping soiree, I created different stations that held supplies for the guests. 
The first station housed beautiful colors and patterns of  Minted wrapping paper sheets. Guests were able to choose their favorite wrapping for their gifts. How beautiful are these papers?! Not only are they perfect for the holidays, they can be used all year round!
 After the guests chose which paper they wanted to wrap their gifts in, they moved on to the next  station. 

Cutting, wrapping and taping the gifts were at the next station as well as pretty ribbon to adorn the packages. I chose ribbon and trim that coordinated and complemented the gift wrap. You can never have too much ribbon or sparkles!


The guests wrapped up their packages and adorned them with ribbon. They were now ready to move to the next station. 


The next station was filled with embellishments to dress up the packages. 
I'm always looking for fun and unique ways to embellish my gifts and this is such a fun idea. Apply a vintage stamp or two to your packages like this festive Currier and Ives postage stamp.  Sincerely Evelyn has the cutest vintage Christmas postage stamps that could not have been more perfect for the wrapped gifts.


Another unique idea to embellish a package (and one of my favorite ways!) is to tuck vintage Christmas photos underneath the ribbon. I love finding old photos of my extended family enjoying the holidays and I'm so happy those moments were captured. Make copies of the vintage photos and attach them to the gift. If you can't find any old family photos, try scouring an antique store for fun vintage Christmas photos.


Tie up those pretty packages with sparkling silver ribbon, light pink shimmer and striped cotton ribbon. You can't go wrong with any of these beautiful ways to embellish your gift!


We had so much fun at our gift wrapping party and now we're all finished with our Christmas wrapping! A huge thanks to Minted for supplying all the beautiful wrapping paper, ribbon and holiday decor for the party.
Thank you so much for stopping by and I hope you have a wonderful holiday season!


Shop this post


Thursday, November 30, 2017

No Sew Peppermint Garland with Cricut Maker

This is a sponsored conversation written by me on behalf of Cricut. The opinions and text are all mine.


no sew peppermint garland using the cricut maker

When the Cricut Maker came out, my mind was swirling with all the possibilites of making beautiful projects out of fabric. Then I remembered I can't sew to save my life! It's never too late to learn thought, right?
If  you're like me and LOVE a good no sew project, I've got a fun and easy one for you today. 

Dress up your mantle in no time with this quick and simple no-sew garland. A pop of aqua is a beautiful and unique twist on the traditional reds and greens of the holiday season. 
Check out the tutorial below to make one of your own!

This is what you'll need to create a no sew peppermint garland.  


In Cricut Design Space, search for "peppermint" and this little guy will pop up. As cute as his sweet face is, I decided to remove it for this project. Simply cross out the parts of the image you won't be using. 


Add three circles in three different sizes to the canvas. I chose to do a small, medium and large circles for my garland.


I had the machine cut out eight of each design onto felt. Make sure to select "felt" as the option on your Cricut Maker.

After your cuts are completed and you've assembled the parts of the peppermint, place the circles all in a row. 

Apply a bead of glue across the entire row of felt circles.
Lay a string of baker's twine on top of the bead of glue and allow it to dry and adhere to the felt circles. 

And there you have it! 
A sweet and simple no-sew garland to make your spirits bright!


I made this adorable Cookies for Santa and Milk for Santa cookie plate and glass using my Cricut Maker and vinyl. You can find the svg file HERE. 

Doesn't it look darling surrounded with the peppermint garland? Santa will definitely be stopping by to grab some cookies off this fun plate! 


Thanks so much for stopping by and have a wonderful holiday season!


Looking for more Christmas inspiration? Check these out!

Letters to Santa Play Date


It's a Marshmallow World in the Winter Party


This is a sponsored conversation written by me on behalf of Cricut. The opinions and text are all mine.

Santa Sack Delivery Tote


 One of our family's favorite holiday traditions is our North Pole Breakfast. 
Beginning on the first Saturday in December, little elves ( shhhh...it's actually me)  make a yummy, festive breakfast and bring Christmas pajamas for our little girl to wear throughout the Christmas season. This year I thought it would be fun for the elves to bring a special delivery sack straight from Mr. Claus himself! 


Here's what you'll need:


Directions:

I thought this Santa SVG image was adorable but you can use any santa sack image you want....or even design your own! 

Using the tote bag template, position your santa sack image over the tote until you achieve the desired size. 

Next, using the text feature, type your child's name and place it over the banner to achieve the correct size.

Once you have positioned your child's name over the banner and achieved the size you've desired, remove the name and place it to the side of the canvas.

Cut the Santa sack image in green heat transfer and your child's name in white heat transfer.

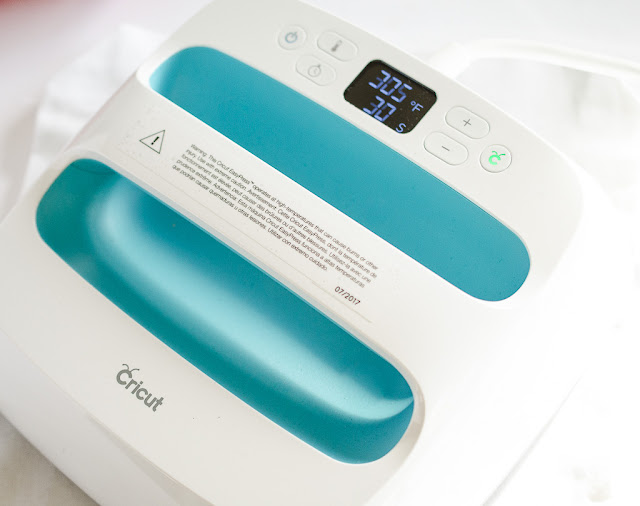
Place the cut image on top of the tote sticky side down and iron the image on to the tote for 30 seconds. 


Carefully peel and remove the top layer of plastic. 

Next, iron on the child's name on top of the banner. 

Tuck in a pair of new Christmas jammies and you're all set! I can't wait to see my daughter's face when she sees her special delivery straight from the North Pole! 


Thanks so much for stopping by and have a wonderful holiday season!

Check out these posts for more Christmas inspiration!


Christmas Pajama Party


Nutcracker Party Ideas

 This review is based strictly on my opinion. I was provided the sample free of charge by Oriental Trading  to provide my honest review. No other type of compensation was received. All ideas and opinions are my own.
Nutcracker Party Ideas


Welcome to the Holiday Party Blog Hop with Oriental Trading


I absolutely adore The Nutcracker. It doesn't feel like Christmas unless we have been to the ballet to see this beautiful performance. Since we are such huge fans of The Nutcracker, I thought it would be fun for my daughter to invite a few of her little friends over for a Nutcracker party of her own.

Be sure to check out the end of the post to see all the fabulous holiday parties from the Holiday Blog Hop! 

Check out below to see how easy it is to put a sweet get-together of your own!

Nutcracker Party Ideas

Here's what you'll need:


These unfinished nutcracker ornaments were the perfect craft for the kids to do. They loved painting their little guys all different colors and were so excited to bring them home to hang on their Christmas trees.
Nutcracker Party Ideas


Here's a quick and easy project to add to your Nutcracker party decor. 

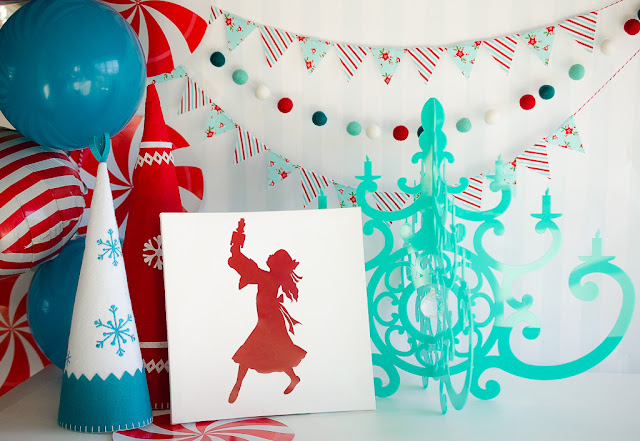
I simply cut out an image of Clara dancing with the Nutcracker on my Cricut machine and adhered it onto the canvas. Super easy, right?! I love how it turned out! 
I
Nutcracker Party Ideas

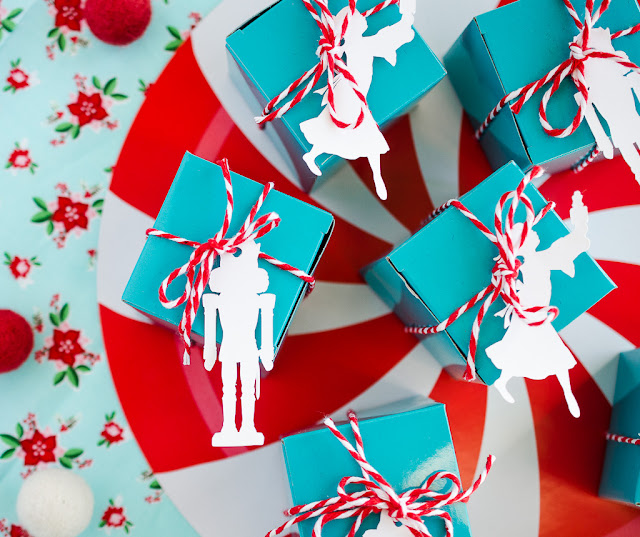
Dress up tiny boxes with red and white bakers twine and fill them with goodies for the kids. I used my Cricut machine to cut out images of the Nutcracker and Clara and turned them into tags to attach to the boxes. 
Nutcracker Party Ideas


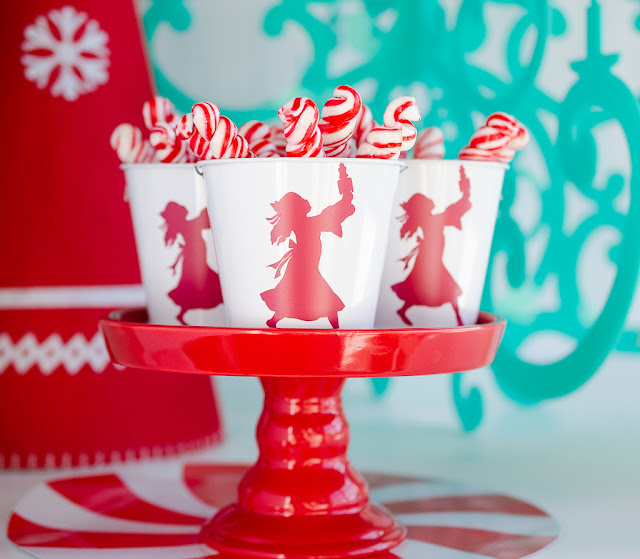
Fill mini favor pails with treats and attach vinyl images of your favorite characters from The Nutcracker. They look extra adorable placed on top of a cake stand!
Nutcracker Party Ideas


Nutcracker Party Ideas

This gorgeous turquoise chandelier from Chandelier By NK  set the stage for the party. Instead of hanging it, I thought it looked beautiful sitting right on the display table. What I love about this chandelier is the bright, happy color and the custom sparkling crystal. You can customize your chandelier and swap out the crystal for another color. The possibilities are endless!  
Nutcracker Party Ideas

After the party, my daughter was thrilled to have the chandelier hung up in her bedroom. The early morning light shines through the crystal and sparkling rainbows dance about the walls.She LOVES it!  

To learn more about Chandelier by NK and her campaign to bring her beautiful chandeliers to a trade show in early 2018, head over to her page and read all about it HERE.

Nothing says festive like banners and garlands!  I found some cute Christmas fabric and made made mini banners to string across the backdrop. I love the red and aqua color combo and was so happy to find this darling wool ball garland to incorporate with my banner.  

The little girls had so much fun at our Nutcracker party and are excited to see the ballet this holiday season! 

I hope you've enjoyed this fabulous Holiday Party Blog Hop hosted by the lovely and talented Jess of Everyday Party Magazine

Thanks so much for stopping by! 


Check out these fun  Christmas ideas!

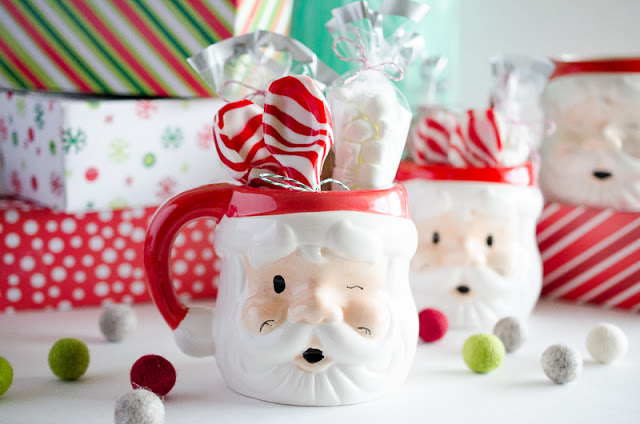
Hot Cocoa Kits


Christmas Pajama Party